How To Draw A Rose Step By Step For Beginners
When we think of love, one of the first things that come to mind is roses. These flowers have been associated with romance for centuries, and their popularity has continued through the years. Just as writers praise her beauty with words, many artists pay tribute to her through drawing. You too can learn how to draw a rose!
Drawing a rose is difficult even for the most experienced artists. Its many petals make it necessary to have a good understanding of foreshortening and shading techniques to create a realistic rose.
Improving your drawing skills is not something that is done in a day. It takes years (and many hours) of practice to make a well-made rose, but each flower you draw will help you perfect your technique.
Before you start drawing your rose, make sure you have the correct materials.
Roses have a wide variety of shades. The petals fold over each other, and this creates deep shadows with lighter parts on the outer edges of the plant. Due to this opposition of hues, you will need at least two drawing pencils. One should be hard (H to 9H) and the other should be softer (B to B9). The harder pencils will allow you to draw fine details, while the softer pencils are good for shading.
Once you have your pencils ready make sure you have a good eraser, another essential tool for drawing.
Select your source of inspiration
When you are starting to draw, it is preferable to create your illustration from direct observation. However, live flowers are a particular case, as they can look different at the end of the day. If you want to make sure your flower looks the same from beginning to end of the process, you can rely on a photo like this.

How To Draw A Rose Step By Step For Beginners
How To Draw A Rose : Step By Step For Beginners
Step 1. We draw an irregular circle
First draw an irregular circle, that is, it does not need to be perfect. If the circle is distorted in certain places, it will help the naturalness of our rose. This circle represents our entire area that the rose will occupy on the surface of the paper or support you are using.

How To Draw A Rose Step By Step For Beginners
Step 2. We will draw the stem of the rose

How To Draw A Rose Step By Step For Beginners
Then with a sure and firm line, we will make a sinuous line to locate the stem of our rose. It does not have to be a straight line, because observing nature we can see with the naked eye that no one is. But the direction of this line must have coherence and be drawn in one direction.
Step 3. Draw some leaves on the stem
How To Draw A Rose Step By Step For Beginners
Then draw right in the middle of the stem, two leaves with their tips in opposite directions. Remember that in nature perfection and symmetry are organic and unplanned, that is why he draws in all the steps with very loose and dynamic lines.
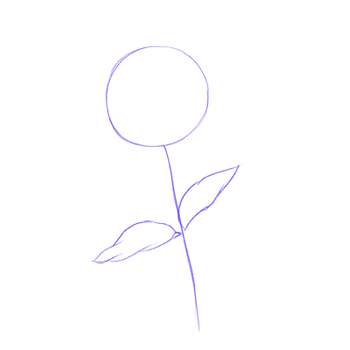
Step 4. We draw the center of the rose
How To Draw A Rose Step By Step For Beginners
Then add another somewhat flattened irregular circle inside the first one. This circle represents the uppermost part of our rose, and will decide the perspective and angle where we draw all of our rose. If you play with its location, you will see how the viewer's vision, that is, the perspective changes.
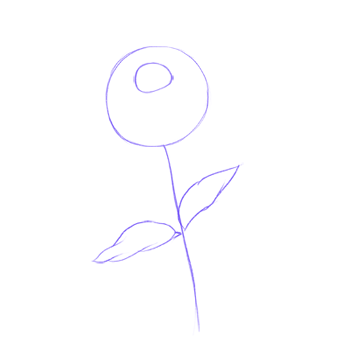
Step 5. We will create the divisions of the petals
How To Draw A Rose Step By Step For Beginners
We will draw a second larger and outer circle than the previous one mentioned, it must follow its own shape and not repeat the same curvatures and positions of the previous one, remember that the irregularity in these cases is our friend.
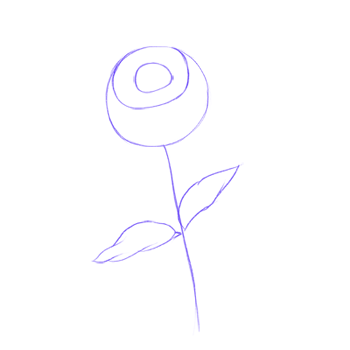
Step 6. We will divide the parts of the petals into three
How To Draw A Rose Step By Step For Beginners
He then proceeds to draw an even more outer circle, thus dividing our initial circumference into four spaces. The center is obviously the innermost circle. If we observe all kinds of flowers in nature, we will see how, in general, their center is where the newer and smaller petals are concentrated, the more they grow, the bigger the flower becomes, and it creates these rings of folds.
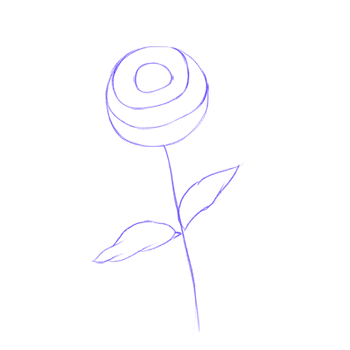
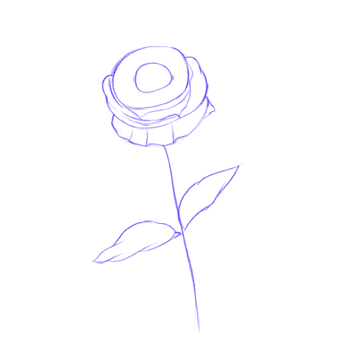
Step 7. We will outline our flower
How To Draw A Rose Step By Step For Beginners
We will erase some lines from our circle from Step 1, and add small curvatures to create our first petals, you can imagine that you are drawing some kind of cotton.
Step 8. We will draw the petals in the middle
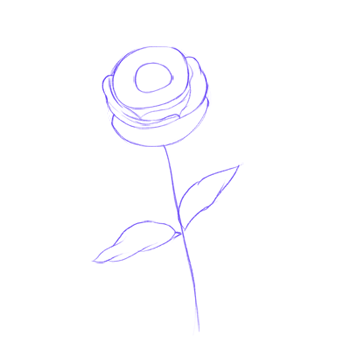
How To Draw A Rose Step By Step For Beginners
We will finally create the content lines, we will start by dividing the middle. These are intermediate petals, which are neither very closed nor very open. Depending on the perspective, we will add some delicate lines imitating these folds of petals so common in roses.
Step 9. We will draw the outermost petals
How To Draw A Rose Step By Step For Beginners
Proceed to draw the outermost petal folds. We will simulate a kind of skirt, these are the largest and loosest petals, therefore, their planes are more visible than the others.
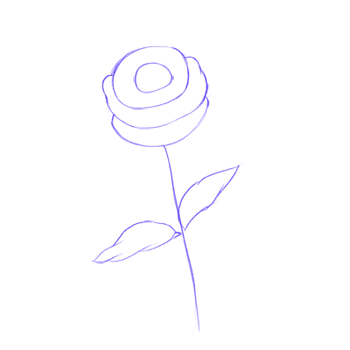
Step 10. We will add the innermost petals
How To Draw A Rose Step By Step For Beginners
In the opposite direction, we will draw the innermost petals, add a kind of cocoon, a figure that the nascent petals form, and that create a kind of cylinder with several layers rolled up in it. This area in the upper part of our rose, and where the eye of the beholder will focus due to the amount of detail it has.
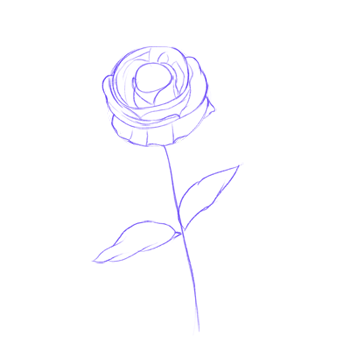
Step 11. We will add the final petals from the center
How To Draw A Rose Step By Step For Beginners
As we mentioned earlier, the center is a cylinder of rolled pleats. As if it were a roll of cloth, we must draw the layers of the folds releasing from the cylinder, creating a kind of swirl on the lid, this is usually the most important part of a rose, in terms of drawings and painting of roses.
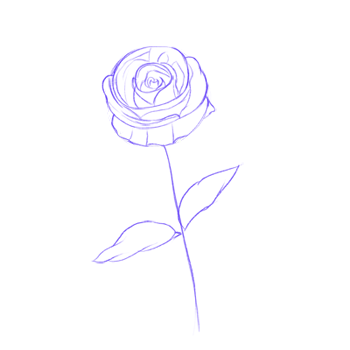
Step 12. Add more leaves and details on the stem

How To Draw A Rose Step By Step For Beginners
We are close to finishing, to give more realism, draw more leaves on the stem, and a few small ones near the birth of our rose. The more leaves with different positions you draw, the more life and naturalness your rose will have. Have fun adding all the elements you want!
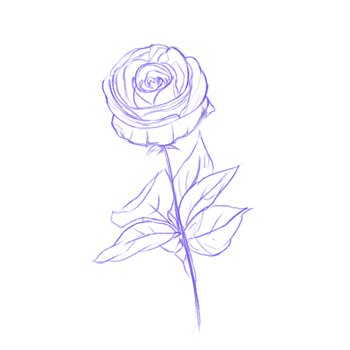
Step 13. Final details and volume of lines
How To Draw A Rose Step By Step For Beginners
We culminate in adding the final details, such as increasing the thickness of the stem, drawing the veins of the leaves, further defining the thick and thin petals that wrap the center of the flower and its outer zone. We can continue to detail our flower to infinity, your mind is the limit. You decide when to finish your rose drawing, in this case, we consider that in this step we have finished with our drawing, what did you think of your rose?