Ichimoku Kinko Hyo Tutorial Part-3
In the next series of Ichimoku tutorial, we’ll discuss the basics of one of the most important component – Kumo. In Japanese, kumo means the cloud. I’ll take 3 different examples of chart to understand it. For the sake of clarity, I’ve removed all other components of Ichimoku (TS, KS etc.) except Kumo.
Example 1

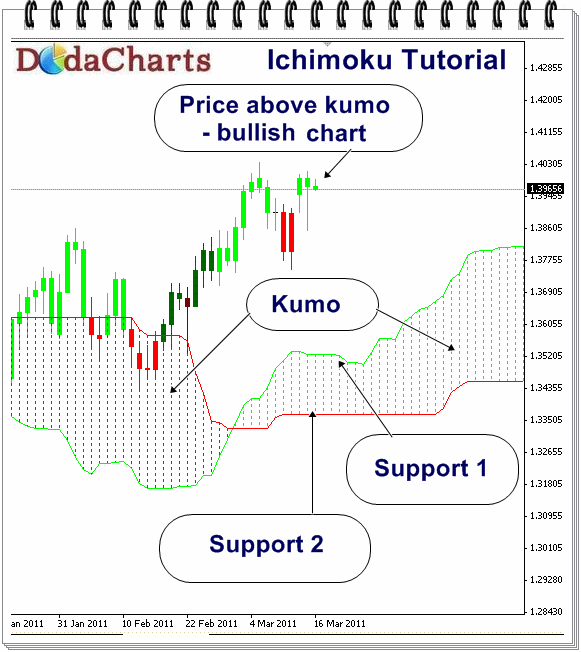
In the above chart, the price is ABOVE kumo. So, we can say, the chart is bullish and one should take only long calls in it. Just avoid any short-selling till the price is above kumo. And in such a situation, the upper & lower lines of Kumo acts as support lines. It has been seen that during bullish run, price sometimes takes support at these lines and then bounce back from here.
Example 2

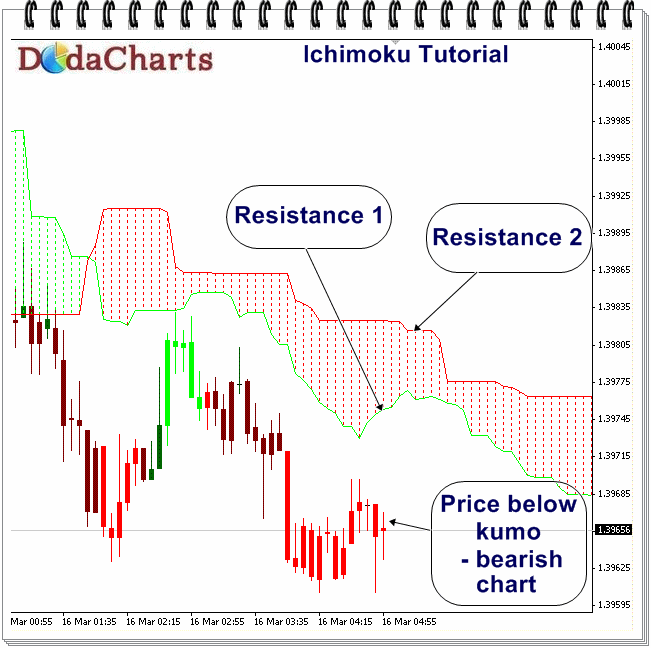
Chart of example 2 shows bearish chart, as the price is BELOW kumo and now the same lower and upper lines of Kumo acts as resistance1 and resistance2. One should take ONLY short-selling calls in such charts.
Example 3

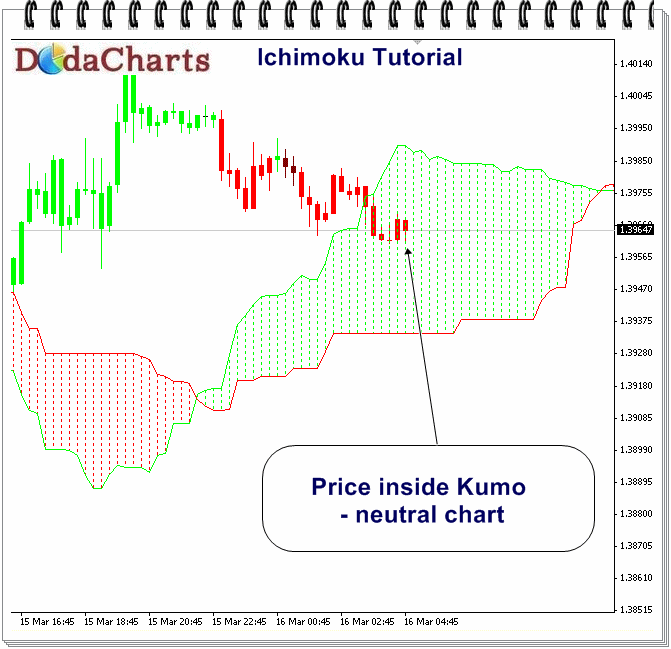
In 3rd example chart, the price is INSIDE kumo, so this is a neutral chart. Avoid taking any call in such charts till the price CLOSES above or below kumo. Because you never know where the trend will move from here, so just avoid these charts and look at other opportunities in the market.
In the next part, we’ll discuss about more on kumo – Future Kumo.